
Step 1
Open Flexi Print

Step 2
Select Setup - Default Job Properties

Step 3
Select Color Management Tab

Step 4
Select Color Mapping

Step 5
Select Add

Step 6
Add the Name in the Color Tab: Example for back printing acrylic ADA is added Before the Name Always use all caps with a space between letters and numbers.

Step 7
Press Measure Color - Then Setup iONE Profiler and Calibrate Scanner by placing it on the white point holder and press calibrate

Step 8
After Placing profiler on white point holder press the button on the side of the profiler

Step 9
Place iOne Profiler in Clear measurement holder and press measure. Place the profiler over the color to be made and press the side button on profiler.

Step 10
After Scanning the color the results will show up in L.A.B. Please write these numbers down on spot color maker chart.

Step 11
Press OK

Step 12
Change Increment to 20

Step 13
Change Width to 6".0in

Step 14
Press Print Swatch

Step 15
Press Ok

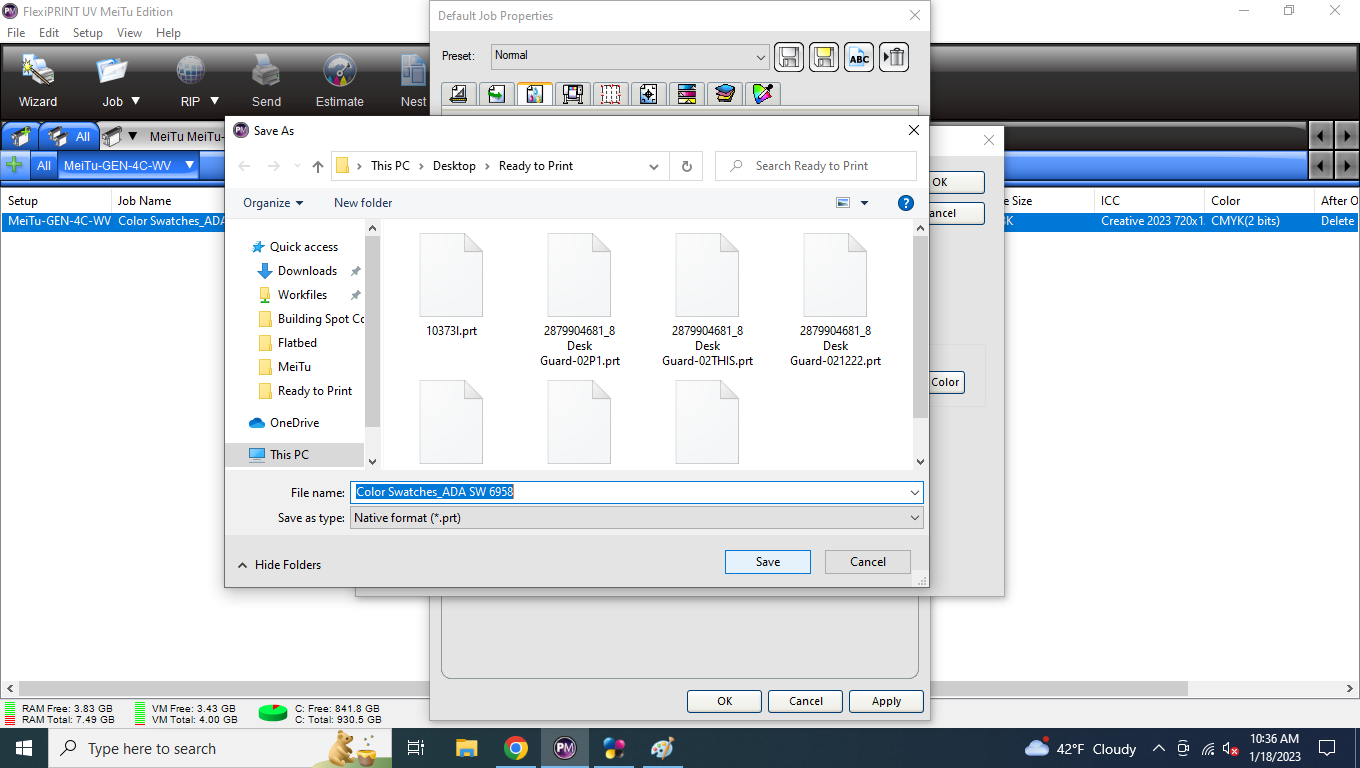
Step 16
Add -1 After Name and Press Save
Step 17
Open Printer Driver select settings
For Surface Printing Select the Following
(Common Settings) Y Print Direct: Forward
(Advance Function) Channel: Normal
Mirror Print: No Mirror
For Back Printing Acrylic Select the Following
(Common Settings) Y Print Direct: Reverse
(Advance Function) Channel: Normal
Mirror Print: Horz Mirror

Step 18
Press Save

Step 19
Select File tab. Then select file to be printed.

Step 20
Select Print Tab and Press Print

Step 21
After print completes Open FlexiPrint Press Measure Color

Step 22
Press Measure - Place iONE Profiler in clear measurement holder and press side button over color chart to see L.A.B color results

Step 23
Compare Measurement Color to Original L.A.B color scan. If the L is higher than original color scan a darker color patch. If the L is lower than original measurement scan a lighter patch.

Step 24
When you have scanned a patch that is the close to the original measurement select Cancel ““““DO NOT PRESS OK’’’’’’’ ““““DO NOT PRESS OK’’’’’’’

Step 25
Change Increment to 10 and Width to 6.0in

Step 26
Update Closest Matching Swatch X: & Y: Then press print swatch.

Step 27
Repeat Step 15 to 24
Step 28
Change Increment to 5 and Width to 6.0in

Step 29
Update Closest Matching Swatch X: & Y: Then press print swatch.

Step 30
Repeat Step 15 to 24
Step 31
Update Closest Matching Swatch X: & Y: Write Down Finial Cyan, Magenta, Yellow, Black Percents on the spot color maker chart. Then Press OK
